Hot-swappable keyboards have significantly made the lives of keyboard enthusiasts a lot easier. With just a few steps, users can easily replace the switches of their keyboards without soldering and desoldering. And best of all, there are almost no downsides to these kinds of keyboards.
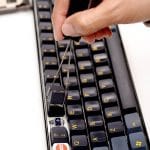
Replacing switches on a hot-swap board is very simple. Just take out the keycaps and pull out the switches using a switch puller. Once the switches are out, drop in the new switches, and you’re done. Just make sure that the switches are compatible with the PCB.
Of course, newer users may have concerns, especially when dealing with keyboards with tighter sockets. Also, some users are unsure if their keyboards feature a hot-swap PCB and wonder whether they can pull out the switches without damaging the keyboard.
In this article, we’ll be answering all those questions. We will show you the easiest way to swap out mechanical switches and all the important details that enthusiasts need to know when dealing with these kinds of keyboards.
What are Mechanical Keyboard Switches?
Switches are a mechanical keyboard’s most important feature. Whether talking about professional keyboards made for productivity or gaming keyboards, the smoothness, fluidity, and sound are all about the switches.
Cherry’s MX Switch series is the most famous mechanical keyboard switch and became the standard of mechanical keyboards. However, nowadays, there’s an incredible number of companies making switches, such as; Kailh, Razer, Logitech, HyperX, and many more.
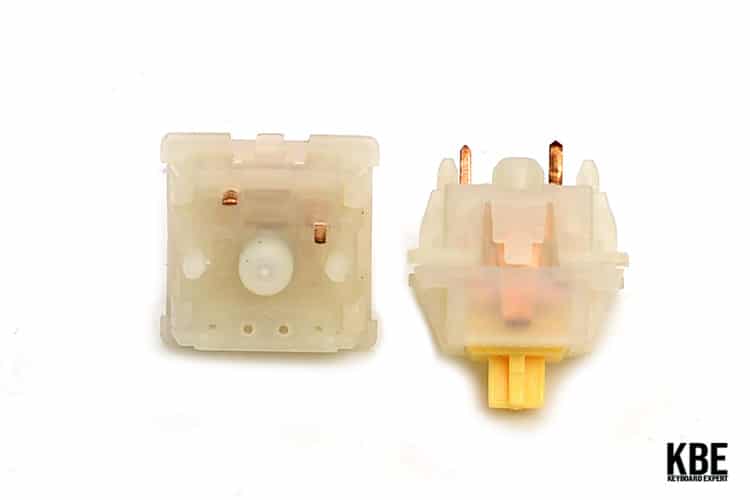
Mechanical keyboard switches are composed of a plastic stem attached to the keycap, held by a spring, and pressed down. The switches are generally classified into three types; linear switch, tactile switch, and clicky switch.
A linear switch is the simplest and needs to be pressed down all the way, while tactile switches activate once the tactile bump has been encountered. Linear switches are generally faster and are more preferred for gaming. Lastly, clicky switches are more like tactile switches with a bump but are followed by a clicking noise. To learn more about the different types of mechanical switches, check out our mechanical switch guide.
Why Remove Keyboard Switches?
Some users might wonder why you would remove switches, especially when the stock one is already good. Of course, if someone already enjoys their current switch, there is no need to replace them. However, having easily removable switches has a lot of perks.
The first one is maintenance. It is rare for mechanical switches to break, but it is relatively easy for users to replace them if needed. Also, cleaning mechanical keyboards with hot-swap, PCBs is much easier, especially when dealing with debris or dirt stuck between the switches.
But with that said, the most significant reason to remove and replace switches is experimentation. As we have mentioned earlier, there are tons of switches outside the Cherry MX series. With hot-swap keyboards, users can try out all those switches without purchasing a new keyboard.
Users can even modify the switches via spring swap, lubing and filming with ease. Testing switches is typically hard for solder keyboards since the individual switches need to be soldered and desoldered every time a user wants to modify them.
Are All Keyboards Hot-Swappable?
Before you dive into swapping out your switches, remember one thing: Not every mechanical keyboard has switches that you can easily swap out. Some mechanical keyboards have switches that are soldered to the PCB, and what that means is that you must desolder the switches first before you can remove them.
If you attempt to pull out switches from a solder-only keyboard, you will break your switches and potentially even your PCB. To know if your keyboard features hot-swappable sockets, make sure to always refer to the manufacturer’s website or the packaging of the keyboard. When dealing with OEM items, try looking for model numbers to help identify the unit or asking on online forums such as Mechanical Keyboard Subreddit /rmechanicalkeyboards.
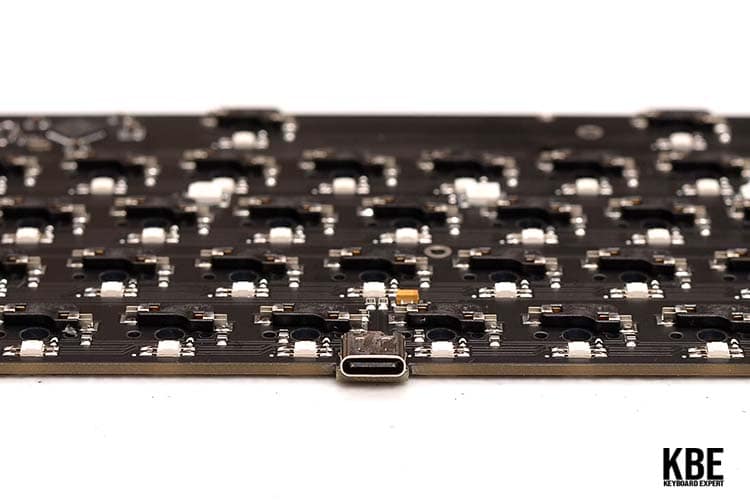
For those who have access to the mechanical keyboard’s PCB, check if there are hot-swap sockets on the back of the PCB. If these are absent, then the PCB is solder-only.
Mechanical Keyboard Switch Compatibility
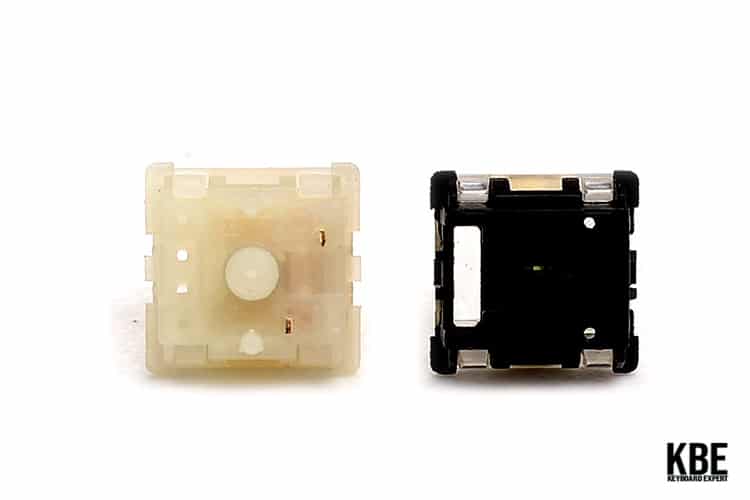
Another thing to take note of is the switch compatibility of the keyboard. When it comes to hot-swap keyboards, there are generally two types: optical and mechanical. Optical keyboards are only compatible with optical switches. And likewise, mechanical keyboards are only compatible with mechanical switches.
The two switches can easily be differentiated. Optical switches do not have metal pins underneath, unlike mechanical keyboards. Take note of these when purchasing mechanical key switches.
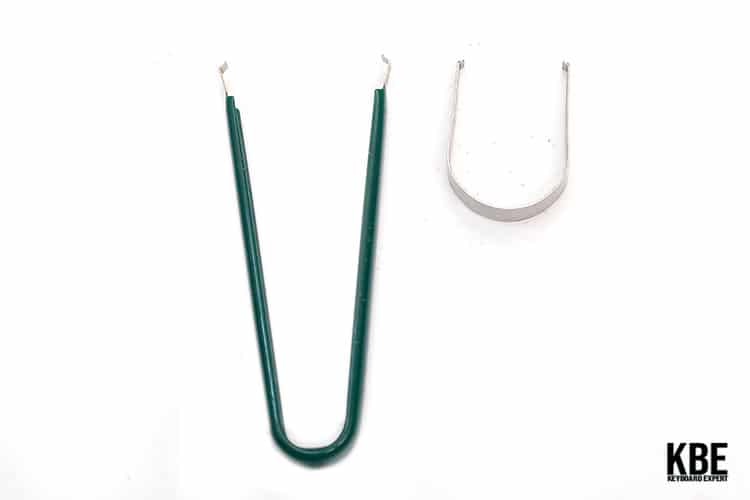
As for mechanical key switches: PCB mount (5-pin) and Plate mount (3-pin) are the most common. 5-pin switches are more stable and can work without a plate, while 3-pin switches require a plate. Most newer keyboards are compatible with both 3-pin and 5-pin switches. However, make sure to check your keyboard’s compatibility first before purchasing switches.
If your mechanical keyboard only supports 3-pin switches, there is still a way to use 5-pin switches. However, this involves irreversibly modifying the switches by cutting off the two extra legs. We do not recommend this method and suggest preserving the switches’ original state for future builds.
Best Tools for Removing Switches
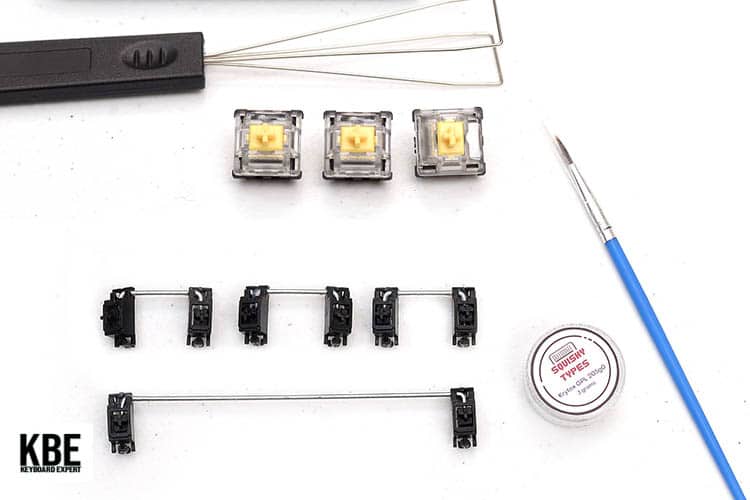
There are plenty of tools that you can use to remove mechanical switches. However, we highly recommend using the OEM switch pullers that most enthusiasts use, the switch puller that comes with your keyboard kit, or the Rama Works Switch Puller.
Does the Quality of My Switch Puller Matter?
Switch pullers may look pretty straightforward. However, choosing the right tool is incredibly important since it can speed up the whole process and prevent scratches or damages. Out of the three switch pullers that we have suggested, we recommend using the OEM switch puller and the Rama Works puller.
Consumers can still opt for the small metal puller, which is often included in the kit. that comes with their kit. However, these tend to be hard to use since they cannot properly grip the switches. The experience of using these is extremely frustrating, so we do not recommend them.
The OEM switch puller is much more useable since it is larger and allows the user to better grip the switches. The price is pretty low, but that also means that the quality isn’t great. Fortunately, Rama Works offers a better version of this keycap puller.
Steps For Removing Switches
Tools Needed
- Keycap puller
- Switch puller
- Pliers
- Clippers (if you need to clip pins)
Prepare the Replacement Switches
Before getting started, identify the switches placed on your keyboard. Make sure that the switches are compatible with the keyboard. And also, take this opportunity to do any modification (lubing, filming, spring swap, housing swap, etc.)
Remove the Keycaps
Before getting access to the switches, first, remove the keycaps. For those who are unsure of how to do so, make sure to check out our Keycap Removal Guide. This process is pretty straightforward but still requires some attention to avoid damage to the keycaps.
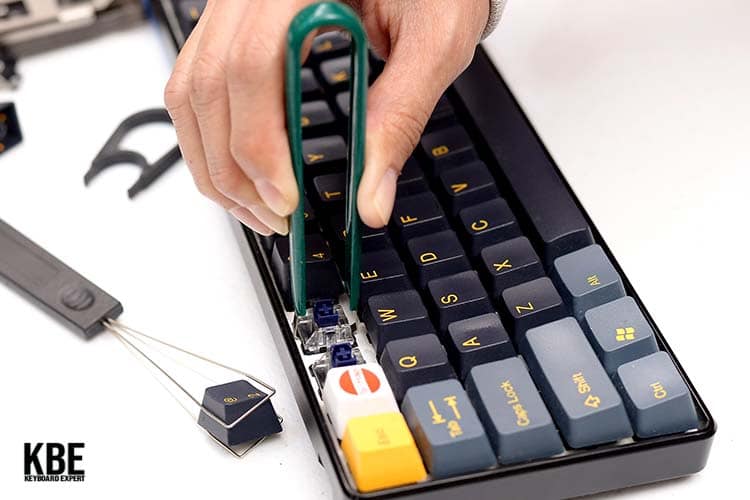
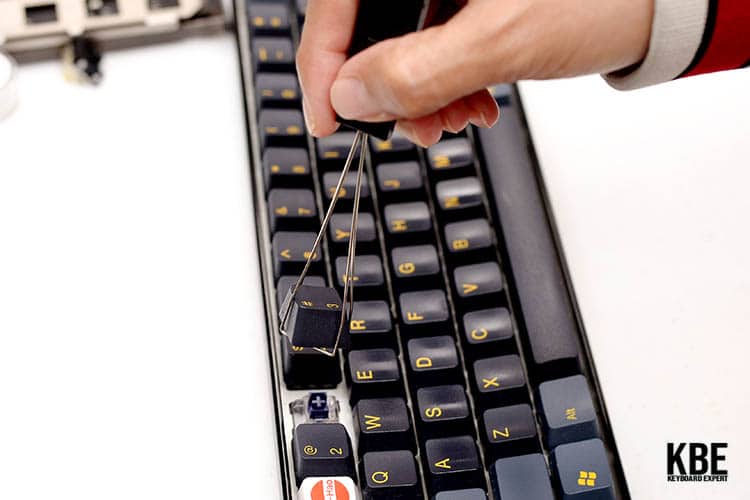
Pull the Keyboard Switches
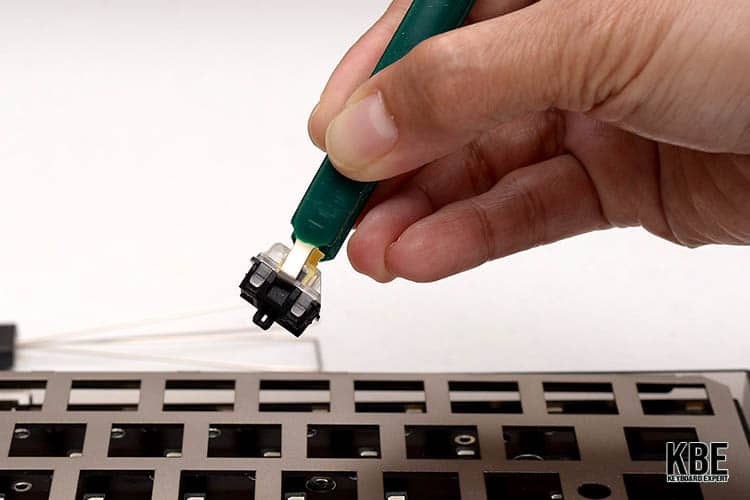
Once all the keycaps have been removed, use your switch puller to take out the switches. First, align the switch puller to the gaps found on the top and bottom of the switch. Once a proper grip has been established, gently pull out the switches.
For switches that are a bit tighter, you can exert a bit more force. Make sure to use your free hand to support the case when removing switches.
Attach The New Switches
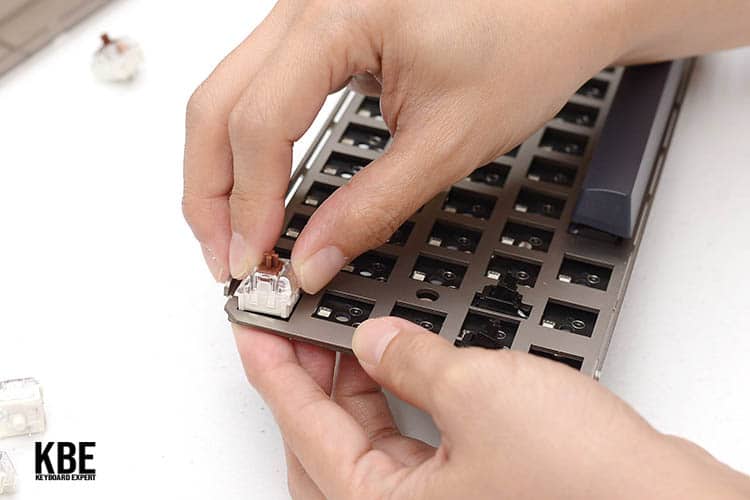
Once all the switches have been taken out, drop in the new switches. Make sure that the pins of the switch align to the hot-swap sockets. If the switches aren’t aligned properly, then pins might get bent.
And when the pins get bent, the switches will not work. If you accidentally bend pins, simply remove the switches and straighten them out. Most switches are durable and won’t be permanently damaged when bent.
Installing Keycaps and Final Checking
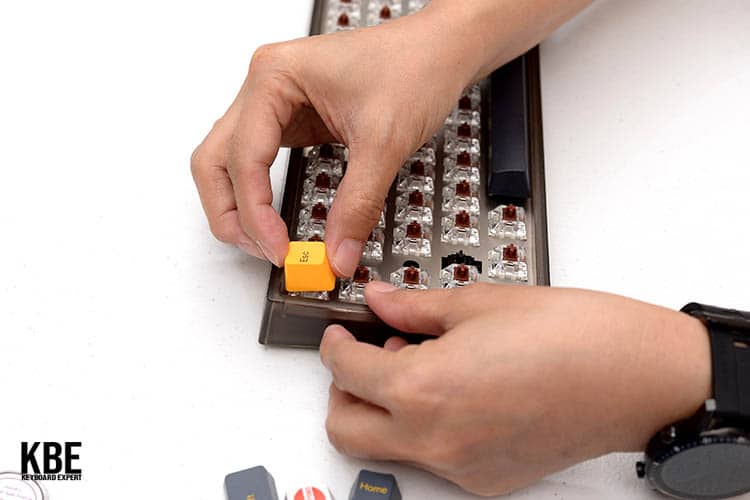
Once all the new switches are seated, drop in the keycaps. Test the various keys if they sound correct. Also, you can use programs such as VIA Configurator to check if all switches are working.
If some switches fail to register, you’ll need to repeat the steps to reseat them correctly. Once everything is confirmed to be working, you have successfully replaced the switches of your keyboard.
The KBE team is dedicated to sharing our knowledge and creating useful resources about computer keyboards. This article was written as a team collaboration, combining our knowledge and years of experience using, building and modding keyboards. Meet the team here.