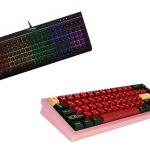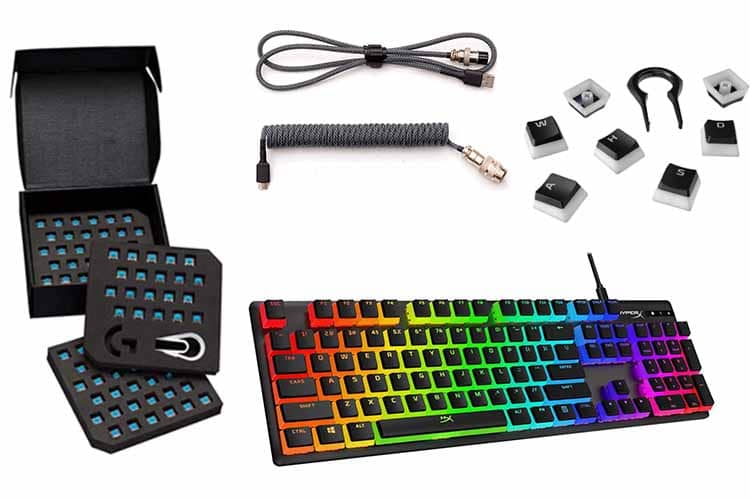
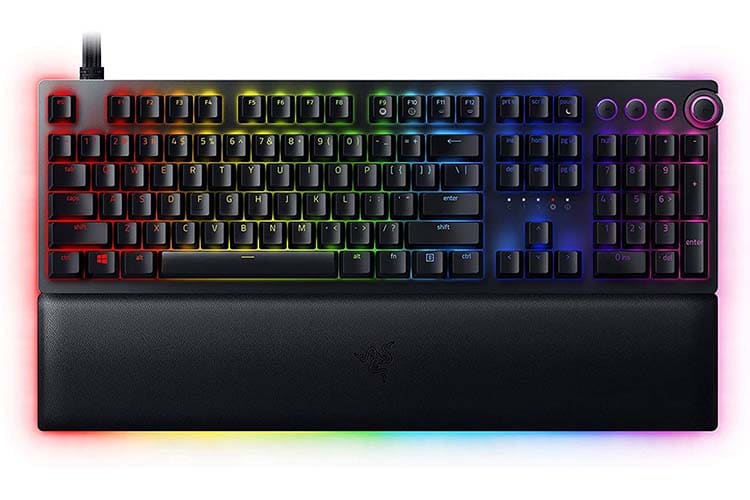
Customization is one of the reasons why mechanical keyboards have taken over the world. The idea of having a keyboard that completely reflects your personality has drawn both gamers and professionals to the world of mechanical keyboards. Of course, this is aside from the fact that mechanical keyboards are considered to be superior to standard membrane keyboards.
Despite having limited customization options, there are still plenty of things that gamers can do to their gaming keyboards. The aesthetics can be modified with new keycaps and cables. And for those who are more daring, the interior of the keyboard can further be customized via lubing and foam mods.
However, when it comes to customization, custom keyboards have been the way to go. This is because gaming keyboards are not designed to offer users customization options. But the good news is that there are still plenty of things that can be done with pre-built gaming keyboards.
In this article, we will be going through some basic mods that can be done to gaming keyboards. These involve aesthetic mods as well as more in-depth mods that require disassembly.
Of course, these advanced mods may potentially void your warranty. Proceed with caution with mods that require keyboard disassembly.
Basic Customization
These customization options are the simplest to do since they do not involve altering the interior of the keyboard. Most of the components needed here can be bought directly in major retail stores or online platforms. Apart from software-related features, most of these are cosmetic changes that have little to no effect on the feel and performance of the keyboard.
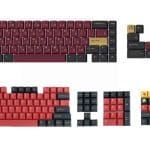
Replacing Keycaps
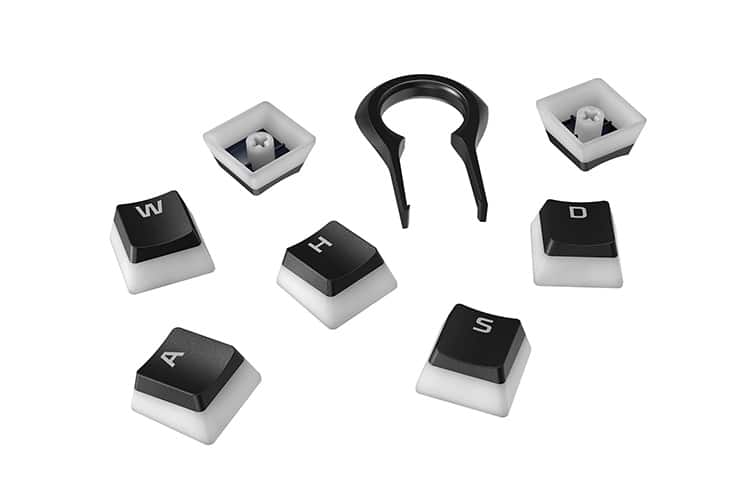
The simplest thing that any gamer can do to customize their mechanical gaming keyboard is to swap out the keycaps. Doing so can drastically change the aesthetics of your keyboard and can better match the rest of your gaming peripherals. The best thing about it is that it’s extremely easy to do.
Most gaming keyboards come with a keycap puller. As its name suggests, it is a very straightforward tool. Simply pull out the keycaps to remove them. We have a more in-depth guide for removing keycaps.
When it comes to keycaps, there are plenty of options that are available in the market. Most big-name brands, such as Glorious, Hyperx, and Razer, are already offering their own keycap sets.
However, gamers can take this one step further by checking out more expensive offerings from enthusiast-grade brands. These brands include GMK, Drop, and ePBT.
The only thing to consider when purchasing keycaps from non-gaming brands is that they will most likely not feature shine through keycaps. What this means is that the RGB of your gaming keyboard will not illuminate the legends of the keycaps.
There are still some shine-through keycaps in the higher-end keycap market. However, most high-end keycaps from the likes of GMK will not be shine-through.
Also, there are generally two types of keycaps: PBT and ABS Plastic. In a nutshell, PBT keycaps are more durable but are less effective at reproducing vibrant colors. On the other hand, ABS keycaps are less durable but are better at bringing out more accurate colors.
In addition, the thickness of the keycaps plays a more significant role in determining the durability of the keycap rather than the plastic material used. Also, there are different types of legend printing methods, which should also be considered for those who are worried about the lifespan of the legends of the keycaps.
Take note that not all gaming keyboards will be compatible with third-party keycaps. Only mechanical gaming keyboards with MX-style switches will be compatible.
If you have an entry-level membrane gaming keyboard or a Topre keyboard, then these keycaps will not fit. Make sure to properly research your keyboard model before purchasing keycaps.
Replacing the Cable
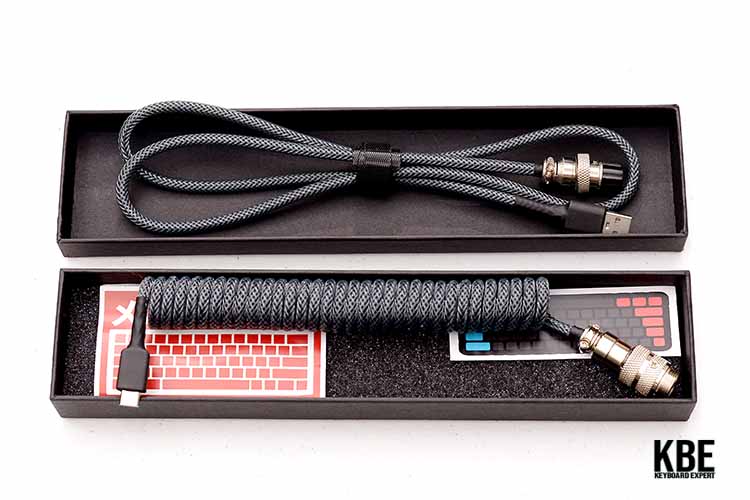
One of the recent trends in the enthusiast-grade custom keyboard scene is the presence of custom cables. These are the colorful and coiled cables that are often seen in custom keyboard setups. If you are someone who likes the look of these cables, the good news is that they can be used on any gaming keyboard that has detachable cables.
At the time of writing this article, there are already a number of established brands that are producing coiled/custom cables. Some of these brands include Razer and Glorious.
However, if you want to further customize the look and feel of these cables, then we highly recommend going through an artisan cable maker. The process will be longer and less straightforward compared to buying them from a big name brand.
But as long as you go through a recommended/trusted cable maker, then the results will easily be worth it. Take note that custom cables are simply for aesthetic purposes. They provide no additional benefits to your gaming keyboard.
Replacing Mechanical Keyboard Switches (Hot-Swap Gaming Keyboards)
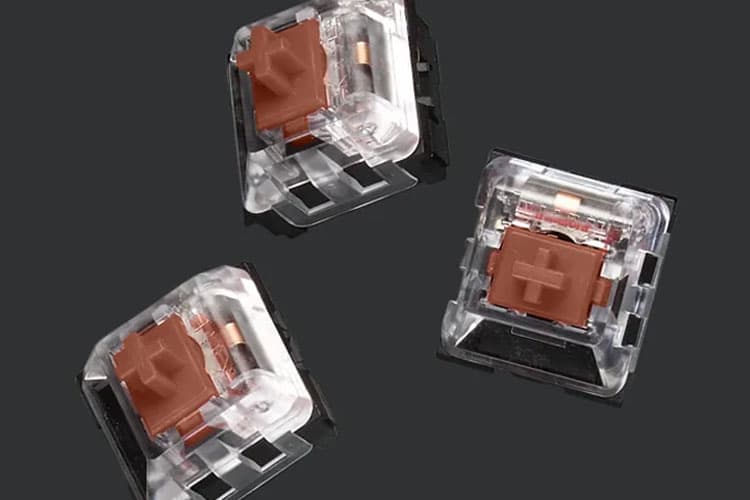
Some gaming keyboards, such as the Logitech G Pro X and Glorious GMMK, allow users to instantly swap out the switches using the included switch puller. This allows users to experiment with different types of gaming switches.
These switches are not exclusive to the ones that are manufactured by a specific company. As long as your gaming keyboard supports it, any switch manufactured by any company can be installed.
The only catch is that most gaming keyboards are only compatible with 3-pin switches/plate mount switches. 5-pin switches/PCB mount switches can still be installed. However, irreversible mods must be made to make them compatible.
Snipping out the two extra feet on 5-pin switches is generally not recommended since they can no longer be used for half-plate and plateless keyboard builds. They can also potentially hurt the resale value of these switches. Of course, for those who are not planning to venture deeper into the world of custom keyboards, then this should not matter too much.
Software Customization
Lastly, gamers can easily customize the functionality of their keyboards via their proprietary software. This seems very obvious and straightforward. However, most gamers tend to skip past the more advanced functionalities of their keyboard software.
Apart from offering RGB control, most gaming keyboard software has advanced functionalities such as macros. These are incredibly powerful tools since they can enable commands that are typically not possible with a normal keyboard. In addition, the ability to set custom keybinds can be extremely helpful, especially with games that are very strict with the control layout.
There are also some gaming keyboards that feature even more advanced customization. The Razer Huntsman V2 Analog and the Steelseries Apex Pro, for instance, allow users to customize the actuation point of the switches. This allows them to specify the sensitivity of the switches.
There are tons of features that can only be unlocked in the software of gaming keyboards. So to fully maximize your gaming keyboard, make sure to explore the proprietary software.
Enthusiast Grade Mods

Enthusiast-grade mods are more advanced techniques to further elevate your gaming keyboard. Most of these involve opening up the keyboard to alter their sound and feel.
Take note that most of these can potentially void the warranty. So unless you have a keyboard that’s meant to be opened up, such as Glorious and Keychron’s offerings, we advise you to be extremely cautious.
Installing Dampening Foam/Silicone Mold
The simplest mod in this category is the installation of dampening foam. By default, most gaming keyboards have a hollow sound. This is primarily due to the fact that there is an empty space in between the PCB and the case.
To make most gaming keyboards sound fuller, users must fill in the gap inside the case. These can be done via installing dampening foam or applying a silicone mold.
Dampening foam can be acquired in different places. Most users originally just recycled the foam that came with their keyboard or any spare foam that is lying around.
However, for the best results, we highly recommend getting foam that is specifically meant for sound dampening. They can be acquired in places such as KBDFans and StupidFish.
To install the dampening foam, first, open up your keyboard. Make sure to properly look up your keyboard model’s disassembly guide. Also, make sure to be very careful during the disassembly process. Most gaming keyboards that have RGB have wires that can break if you are not careful.
Once the PCB and case have been separated, start measuring the dimensions. If the dampening material you have is too large, then cut it to fit the case.
Once this is finished, test if the case can be reassembled without issues. If the fit is too tight, reduce the foam until the case screws back together.
Another alternative to dampening foam is silicone molding. This is considered a more time-consuming process. However, it is still relatively simple.
We will be linking an in-depth guide that covers more about this topic. The main advantage of silicone over foam is that it covers more area and can potentially make the keyboard sound fuller.
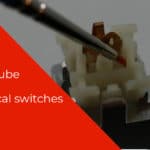
Soldering New Switches
The most significant mod that can be done to any keyboard is installing new switches. As we have discussed earlier, there are some gaming keyboards that can readily accept new switches without desoldering the ones originally installed. However, not all gaming keyboards have this capability.
There are still lots of brands that insist on having their own proprietary switches. And while these switches aren’t bad, some gamers may want more from them.
To install new switches, users must first desolder the ones that are currently installed. Take note that this is not an easy step.
It can be very time-consuming, especially for those who have never held a soldering iron. For this step, we highly recommend using a Hakko desoldering gun.
Once the old switches have been removed, install the new switches by soldering them. And once they have been secured in place, test all of the keys if they are working. The keys can be tested using programs such as VIA.
If any key doesn’t work, desolder and resolder it. Alternatively, you can try installing a new switch to avoid the possibility of having faulty switches.
Once all switches are confirmed to be working, reassemble the keyboard. We strongly advise users to also lube and film the switches, which will be our next topic.
Lubing and Filming Switches
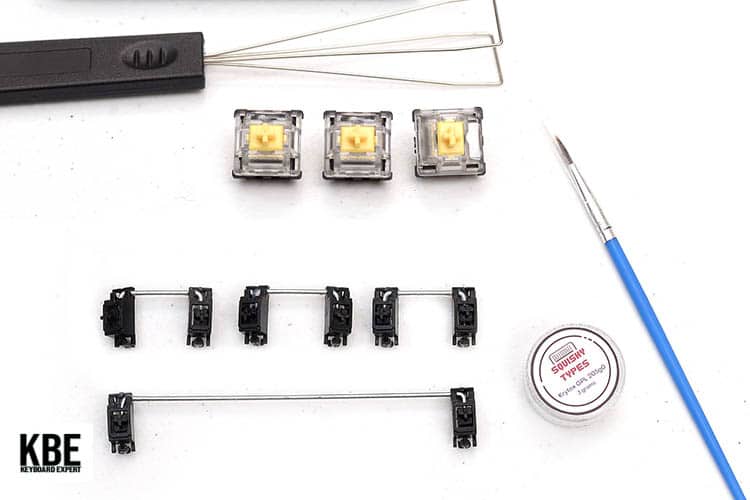
Lubing and filming switches is an additional step that is recommended by most keyboard enthusiasts. To quickly summarize the benefits of this step, lubing helps in reducing the friction that occurs in the stem and housing of the switches.
The end result is a much smoother switch with better acoustics. Switch filming, on the other hand, helps reduce the wobbly nature of some switches. This makes them more secure and will offer a more solid typing experience.
Lubing switches are done with the majority of linear and tactile switches. Switch filming is optional and is only recommended for some switches.
Switch filming and lubing can only be done on switches that are not installed on the keyboard. This is why lubing and filming are best done when desoldering or soldering new switches.
Lubing and filming can be done on both the desoldered switches as well as the new switches. However, if you will be reusing the desoldered switches on another keyboard, we recommend using them in a solder build. This is because desoldered switches are known to have issues with hot-swap keyboards if not done correctly.
We will be linking a complete guide to help users during the lubing and filming process of their mechanical switches.
Lubing and Clipping Stabilizers
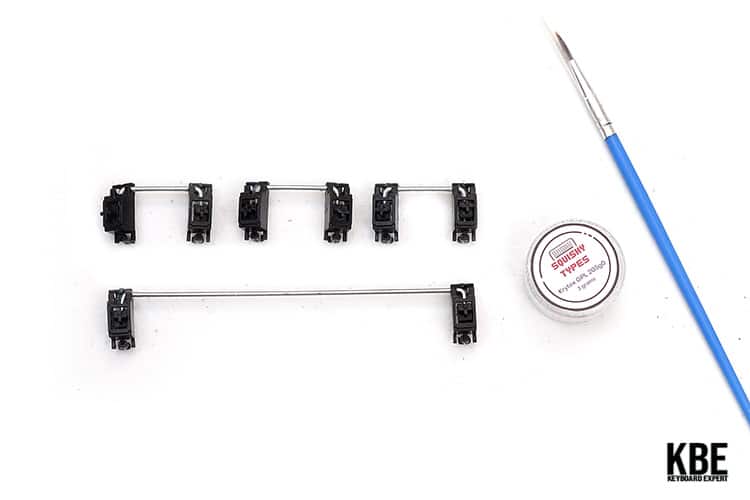
Completely disassembling the keyboard also gives us access to another integral component of the gaming keyboard. These are the stabilizers that can be found under the spacebar, enter, backspace, and shift keys.
The reason why these components have to be modified is that most stock stabilizers found on gaming keyboards are incredibly rattly. They can be extremely annoying and can detract from the overall experience.
Luckily, most gaming keyboard stabilizers can be easily fixed. Once the switches have been desoldered, users will have access to them. Plate mount stabilizers can be easily detached by prying them out. PCB mount stabilizers, on the other hand, will require a screwdriver.
Once they are removed, they can be disassembled. And once they are fully disassembled, lube can be applied on the legs as well as on the stems of the stabilizers. It is also highly recommended to clip the excess plastic on the stabilizers if they are present.
Lubing stabilizers is not very straightforward. Users must go through several trial and error attempts to fully remove the rattle.
Alternatively, users can purchase third-party stabilizers for an even better experience. They will still need to be lubed. However, they will be significantly easier to tune than most stock gaming keyboard stabilizers.
Optional: PE Foam and Tape/Tempest Mod
One of the recent mods that enthusiasts have started doing is the PE Foam and Tape/Tempest mod. These are relatively easy to do but aren’t a requirement for every gaming keyboard.
The tape mod (discovered by the user oTEMPE5To) is very easy to do. Simply put duct tape/non-conductive tape to the back of the PCB.
What this does is that it alters the sound of the keyboard. Some become higher pitched/poppy and louder, while others can sound deeper.
Since it is very easy to do, it is worth a try, especially if you have already disassembled your keyboard. The tape can simply be removed if users are not happy with the results of this mod.
The other mod that has been gaining popularity is the PE Foam mod. The aim of this mod is to simulate the same sound signature of the Jelly Epoch.
Compared to the tape mod, the PE foam mod is a lot harder. The PE foam must be installed in between the plate and the PCB. This means that this mod can only be done when the switches are desoldered.
When these two mods are combined, your gaming keyboard can sound significantly better. However, since not all gamers are concerned about the sound of their keyboard, and given the more complex steps of the PE foam mod, these mods are optional.
Stephen is the head content creator of Keyboardsexpert. His mechanical keyboard journey began in 2014 when he got his Razer Blackwidow. Since then, he has been fascinated with all things mechanical keyboard-related. He later discovered the custom keyboard hobby and fell in love with the vast customization options. He is currently searching for his endgame and is very excited to share his journey and educate other keyboard enthusiasts.