Through-hole keyboards is a type of keyboard that has risen its popularity in the mechanical keyboard market. Moreover, through-hole keyboards have a different PCB than regular custom keyboards and pre-built keyboards.
Messing a solder in your through-hole PCB may make the keyboard malfunction, or worse, not function at all. Thus, these keyboards require a lot of experience and techniques to build.
This article aims to explain the complexity of Through-hole keyboards and present options for those looking to build one.
Through-Hole Technology
The printed circuit boards, popularly known as PCBs, are essentially where the magic takes place as the PCB stands as the keyboard’s electronic brain. Every key you press sends information to the computer via the PCB, which inputs data less than a second.
These printed circuit boards may differ depending on the mechanical keyboard you purchased. However, the primary function stays the same. They translate your physical action of pressing a key into an electrical signal transferred to your computer.
One type of PCB is made of Through-Hole technology— a way of building electronic circuits in which pin-through hole (PTH) components are introduced through drilled holes on the PCBs. The ends, or leads, are soldered with molten metal solder to pads on the opposite side using wave soldering or reflow soldering equipment.
Background Through-Hole technology replaced early electronics assembly techniques such as point-to-point fabrication. Thus, every component on a standard PCB was a through-hole component from the second generation of computers in the 1950s until it evolved to surface-mount technology that became predominant in the late 1980s.
While through-hole mounting produces stronger mechanical bonding than SMT approaches, the additional soldering required increases the cost of production. Soldering is necessary because the holes pass through all layers to the opposite side. Furthermore, through-hole also limits the available routing area for signal traces immediately beneath the top layer on multilayer PCB.
Relevance in Keyboards
View this post on Instagram
- Mechanical keyboards see through-hole keyboards as a way of advancing into the hobby. Although it may take hours to build, it provides a different type of satisfaction, especially to those new to soldering.
- There is no available through-hole pre-built keyboard in the market as of the moment. Thus, you only have two options: solder the PCB on your own or send the unbuilt keyboard to a keyboard builder and pay extra cash.
- There may be a lot of PCBs in the mechanical keyboard market that requires soldering, but the soldering technique needed for a regular custom keyboard and a through-hole keyboard is a bit different. For standard custom keyboards, builders only needed to solder the switches, while through-hole keyboards also have leads that need to be fused along with the mechanical switches.
Through-Hole Keyboards
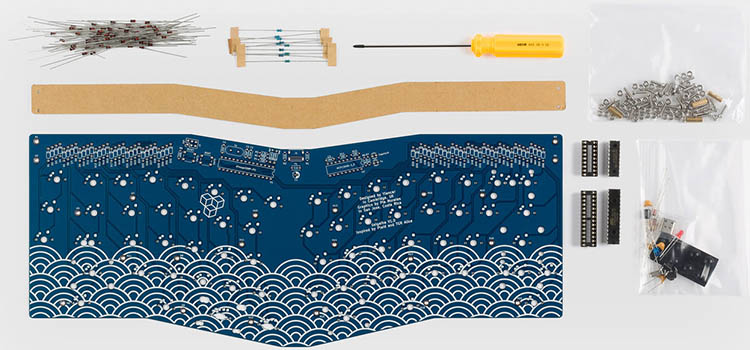
Parts
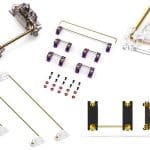
The usual parts of a through-hole keyboard kit are signal diodes, resistors, capacitors, bolts and nuts, microcontroller, port expanders, sockets, main PCB, bottom PCB, and plate. Some optional parts include the case of the keyboards and or a Flexi glass that covers the through-hole process at the upper portion of the keyboard.
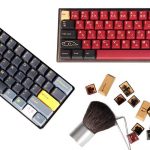
Materials Needed
- Soldering Iron
- Solder (Recommended: 0.6mm 60/40 resin core)
- Wire Cutter
- Soldering Flux (optional but recommended)
- Soldering Sucker
- Soldering Iron Tip Cleaning Sponge
- Tweezers
- Soldering Wick (optional)
- Protective Gears (ex., Gloves, eye protection, etc.)
Although all of these may seem intimidating, there are video tutorials and a manual that will guide you through the whole process.
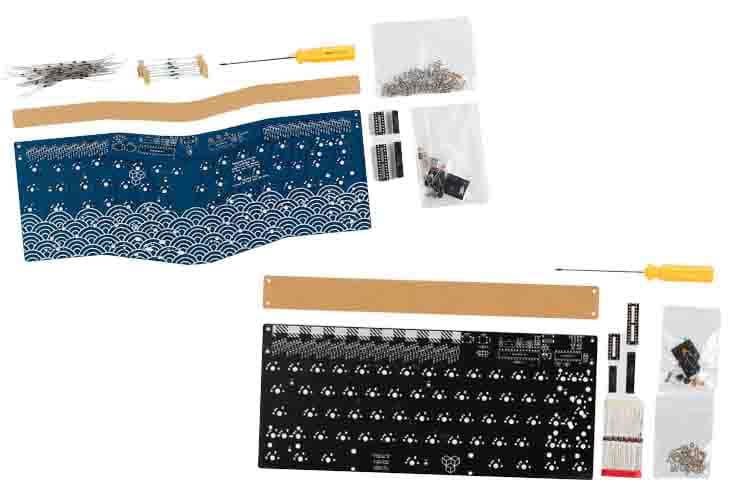
Through-Hole PCBs
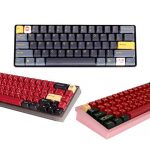
- Through-hole PCBs are mostly only compatible with the kit that came with them. Some through-hole keyboards are bare without any casing, showcasing better soldering work.
- 3rd Party cases can be purchased from shops like P3Dstore.com, and most cases are 3D printed and designed to house bare through-hole keyboards.
- One cannot easily put through-hole PCBs into any keyboard kit as these types of PCBs are larger than regular-sized keyboards. Furthermore, through-hole keyboards have excess space in the top corner of the PCB for the leads to be soldered.
- For example, a 60% through-hole keyboard requires more room than a 60% keyboard.
Perks and Downsides of a Through-Hole Keyboard
View this post on Instagram
- The typing experience depends on the keyboard that you will be purchasing. For example, a bare through-hole keyboard will give a different sound profile than keyboards with cases.
- Through-hole PCBs are delicate and should be handled with the utmost care, especially by beginners.
- These keyboards also have limited mounting styles and may be hard to gasket mount. Thus, lesser flexibility.
- You can do limited customization like tempest tape mod or foam mod if the through-hole keyboard has a case. Furthermore, the work will heavily rely on technicalities like soldering.
- Through-hole keyboards will take twice as long to build compared to regular custom keyboards and thrice as a time to make compared to hot-swappable keyboards.
- Building a through-hole keyboard will give you significant experience and increase your soldering knowledge.
- The aesthetics of a through-hole keyboard is one of a kind and cannot be copied by any hot-swappable or regular custom keyboards. The closest they can have a similarity is when installing a rotary knob.
- Through-hole keyboards are usually cheap despite the materials included in the kit. However, third-party cases are on the more expensive side.
Through-Hole keyboards You Must Try
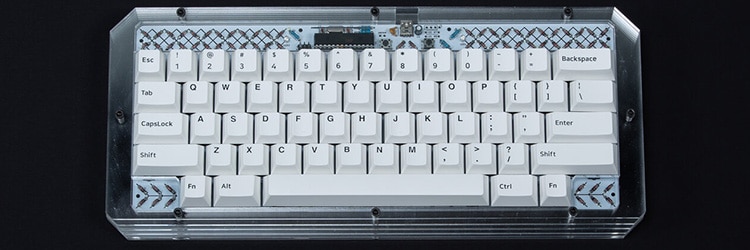
Gingham Keyboard Kit from Novelkeys

Yiancar has designed a 60 percent through-hole keyboard inspired by the plaid design, called Gingham Keyboard. Furthermore, this keyboard supports the ANSI and ISO standards and split right Shift and split Backspace.
The Gingham Keyboard is also QMK compatible, which makes programming more accessible. It also has a Picnic Edition in a different colorway. Both kits are priced at $95.00, without any additional option for a case.
The downside of this kit is that it doesn’t come with a case and will only be provided with a cover for the top part. However, all other components needed are included already.
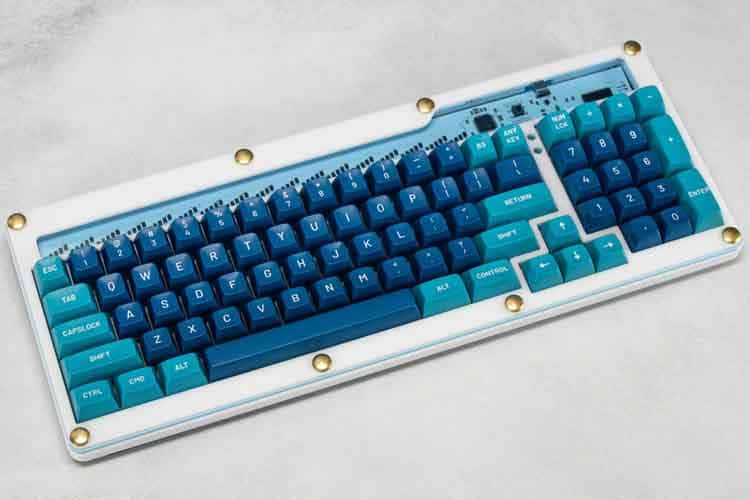
Lattice from Keyhive
The Lattice from Keyhive was designed and created by u/emdarcher— a 60 percent through-hole kit. The base kit starts at $70.00 and can increase depending on the additional case ranging from $40.00 to $50.00.
You will still need to purchase a mini-USB cable, switches, and caps. Other than that, it comes with everything you need to create it. The bootloader is present, which makes customization easier. However, it does not include aluminum feet on the bottom.
Acrylic comes in a limited number of colors. Please include your color preference when you check out, and I’ll work with you to make it happen. If you want something etched on the bottom, please include it in the comments section when you check out, and I’ll contact you. Depending on the design, it will cost more.
Case Options:
- PCB Plate – Comes with the top acrylic cover for the components.
- 3D Print – Can be customized depending on the colors that you can choose on the website
- Acrylic – This has limited color options compared to 3D printed cases. However, you can add your color preference when you check out. You can also etch texts on the bottom, and however, it will cost extra depending on the design.
Barleycorn from P3DStore
This laser-cut acrylic case design is for Yiancar Designs’ P3D SMD Edition of the Barleycorn PCB, with an option to add support for the original barleycorn by incorporating an additional mid-layer add clearance for the through-hole components.
The best feature of this keyboard is the PCB Gasket mount, with gasket foam strips on the top and bottom that will add flexibility to the typing experience. Gasket mounts are rare in through-hole keyboards, which gives the Barleycorn and P3D’s custom case an advantage.
This kit is assembled already, which means that switches are the only thing that requires soldering from this build.
The downside of this kit is it only includes the PCB (if purchased from the shop), the case, and the case hardware. Thus, you must source all other components from third-party sources.
You can purchase the case for $150.00 if you have a Barleycorn PCB from Yincar designs, but you can also buy a PCB on the website for an additional $40.00.
Are Through Hole Keyboards Beginner Friendly?
- First-time builders and beginners in mechanical keyboards are discouraged from building through-hole keyboards as their first build as it requires experience and technique, especially in soldering.
- Through-hole keyboards’ prices depend on components like cases and inclusions. However, you can buy a through-hole keyboard for as low as $70.00.
- Through-hole technology is not essential in keyboard-building and is only required in specific keyboards.